
BlackBerry Development on Mac OS X
Recently, I started developing a new BlackBerry project at work. Naturally, I wanted to setup a build environment on my beloved MacBook Pro. BlackBerry development is Java based, and Java is cross-platform, and so I assumed it would be an easy setup. Was I wrong! It took a lot of research and trial-error; but in the end, I was successful and I wanted to share it here.
BlackBerry has an Eclipse plugin, but that plugin only works on Windows. Fortunately, it’s easy to manually setup eclipse to compile BlackBerry applications. And we can automate the whole process with bb-ant-tools. The more difficult part is to get the BlackBerry simulators run on Mac OS X. We’ll use wine for that. And we’ll use MacPorts to install wine.
Installing Eclipse, bb-ant-tools, and the JDE Plugin
First, download eclipse, unzip, and place the eclipse folder in your /Applications folder.
Then, create a workspace folder to hold your application projects and BlackBerry SDK. Personally, I prefer to keep my projects in ~/Development and I created a ~/Development/BlackBerry folder for my projects and a ~/Development/BlackBerry/SDK folder for the SDK.
You don’t have to mimic the above folder structures for your projects, nor you need to place the application in the /Applications folder, but I think this structure makes life easier for me.
Next, go to the BlackBerry development website and download the latest BlackBerry JDE component for eclipse, v4.7 as of this writing (you can download a previous version if you specifically need it).
We will not be installing the component package in a traditional way in eclipse though, as that requires a Windows environment unfortunately. Instead we’ll do a manual install, of sorts.
First unzip the downloaded package in Finder by double-clicking it. It will be unzipped into a folder of the same name. Go inside that folder and you’ll see two additional folders, features and plugins. Go inside the plugins folder and rename the net.rim.eide.componentpack4.7.0_4.7.0.46.jar file to net.rim.eide.componentpack4.7.0_4.7.0.46.zip file by changing the filename extension to zip (say yes when Finder asks you if you’re sure). Then, double click the new zip file you created and it will be unzipped into a folder of the same name. Move that folder into the ~/Development/BlackBerry/SDK folder you created earlier.
Now, fire up eclipse, select the ~/Development/BlackBerry folder as your workspace (and check ‘always use this folder’ checkbox) if you haven’t already done so, and then select Eclipse->Preferences menu to show the Preferences window.
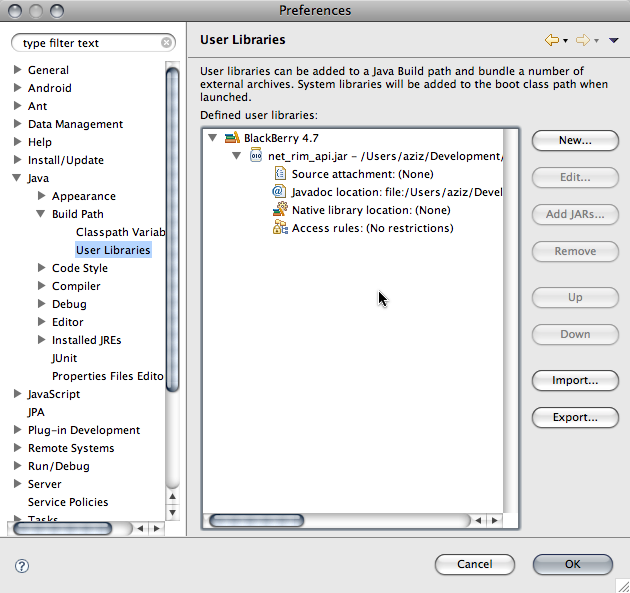
Go to Java->Build Path->User Libraries and click New. Enter “BlackBerry 4.7” as the library name. Next click Add JARs and browse to your ~/Development/BlackBerry/SDK/net.rim.eide.componentpack4.7.0_4.7.0.46/components/lib folder and select net_rim_api.jar file. Also make sure to set the javadoc location to ~/Development/BlackBerry/SDK/net.rim.eide.componentpack4.7.0_4.7.0.46/components/docs/api folder so that you’ll get proper documentation popups in eclipse.
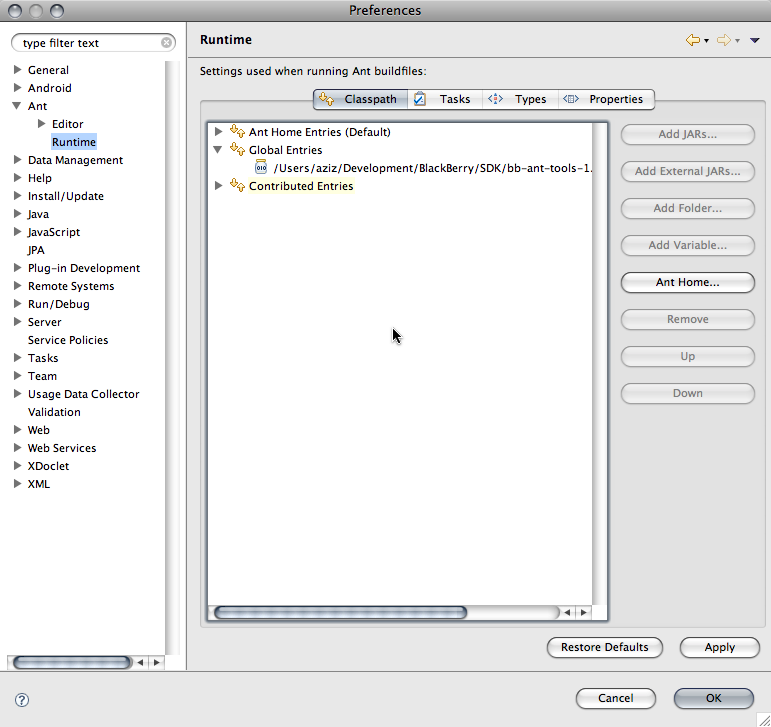
Next, download the latest version of BlackBerry Ant Tools and unzip it. Place the folder in your ~/Development/BlackBerry/SDK folder. Next, open Eclipse->Preferences again and then go to Ant->Runtime and click Add External JARs and browse to bb-ant-tools.jar file. Click OK and close all dialog windows.
You also need to download a Mac OS binary of the preverify.exe that is included in the BlackBerry JDE tools. The easiest way to do so is to download the mpowerplayer sdk, which includes the preverify binary for Mac OS X. Just copy the preverify executable to your ~/Development/BlackBerry/SDK/net.rim.eide.componentpack4.7.0_4.7.0.46/components/bin folder from the mpp-sdk/osx/preverify folder. You can discard the rest of the sdk files if you wish.
Finally, add the ~/Development/BlackBerry/SDK/net.rim.eide.componentpack4.7.0_4.7.0.46/components/bin to your $PATH by editing the ~/.bash_profile file as follows:
export PATH=${PATH}:/Users/aziz/Development/BlackBerry/SDK/net.rim.eide.componentpack4.7.0_4.7.0.46/components/bin
Building Your First BlackBerry App
You’re now ready to compile your first BlackBerry application on your Mac. Create a new Java project in eclipse (select File->New->Java Project). Name the project “HelloWorld”, and leave everything else untouched in the dialog box, and click Next. Select Libraries tab, click on JRE System Library and click Remove. Click Add Library, select User Library, click Next, check BlackBerry 4.7 (or whatever you named it above) and click Finish.
Create a new package, name it com.azizuysal.HelloWorld. Then create a new class and name it HelloWorldApp.java. Here is the source code:
package com.azizuysal.HelloWorld;

import net.rim.device.api.ui.UiApplication;
import net.rim.device.api.ui.component.LabelField;
import net.rim.device.api.ui.container.MainScreen;

public class HelloWorldApp extends UiApplication {
	public HelloWorldApp() {
		MainScreen screen = new MainScreen();
		screen.add(new LabelField("Hello, World!"));
		pushScreen(screen);
	}

	public static void main(String[] args) {
		new HelloWorldApp().enterEventDispatcher();
	}
}
Now, create a build.xml for bb-ant-tools. Go to File->New->Other, select XML and name it build.xml. Enter the following:
<project name="Hello World App" default="build">
	<taskdef resource="bb-ant-defs.xml" />

	<!-- rapc and sigtool require the jde.home property to be set -->
	<property name="jde.home" location="/Users/aziz/Development/BlackBerry/SDK/net.rim.eide.componentpack4.7.0_4.7.0.46/components" />

	<!-- directory of simulator to copy files to -->
	<property name="simulator.home" location="/Users/aziz/Development/BlackBerry/SDK/net.rim.eide.componentpack4.7.0_4.7.0.46/components/simulator" />
	<property name="src.dir" location="src" />
	<property name="build.dir" location="build" />
	<property name="cod.name" value="com_azizuysal_HelloWorld" />

	<target name="build">
		<mkdir dir="${build.dir}" />
		<rapc output="${cod.name}" srcdir="${src.dir}" destdir="${build.dir}">
			<jdp title="Hello World" />
		</rapc>
	</target>

	<target name="sign">
		<sigtool codfile="${build.dir}/${cod.name}.cod" />
	</target>

	<target name="clean">
		<delete dir="${build.dir}" />
	</target>

	<target name="load-simulator" depends="build">
		<copy todir="${simulator.home}">
			<fileset dir="${build.dir}" includes="*.cod,*.cso,*.debug,*.jad,*.jar" />
		</copy>
		<exec executable="/bin/sh">
			<arg value="-c" />
			<arg value="${simulator.home}/9530.sh" />
		</exec>
	</target>
</project>
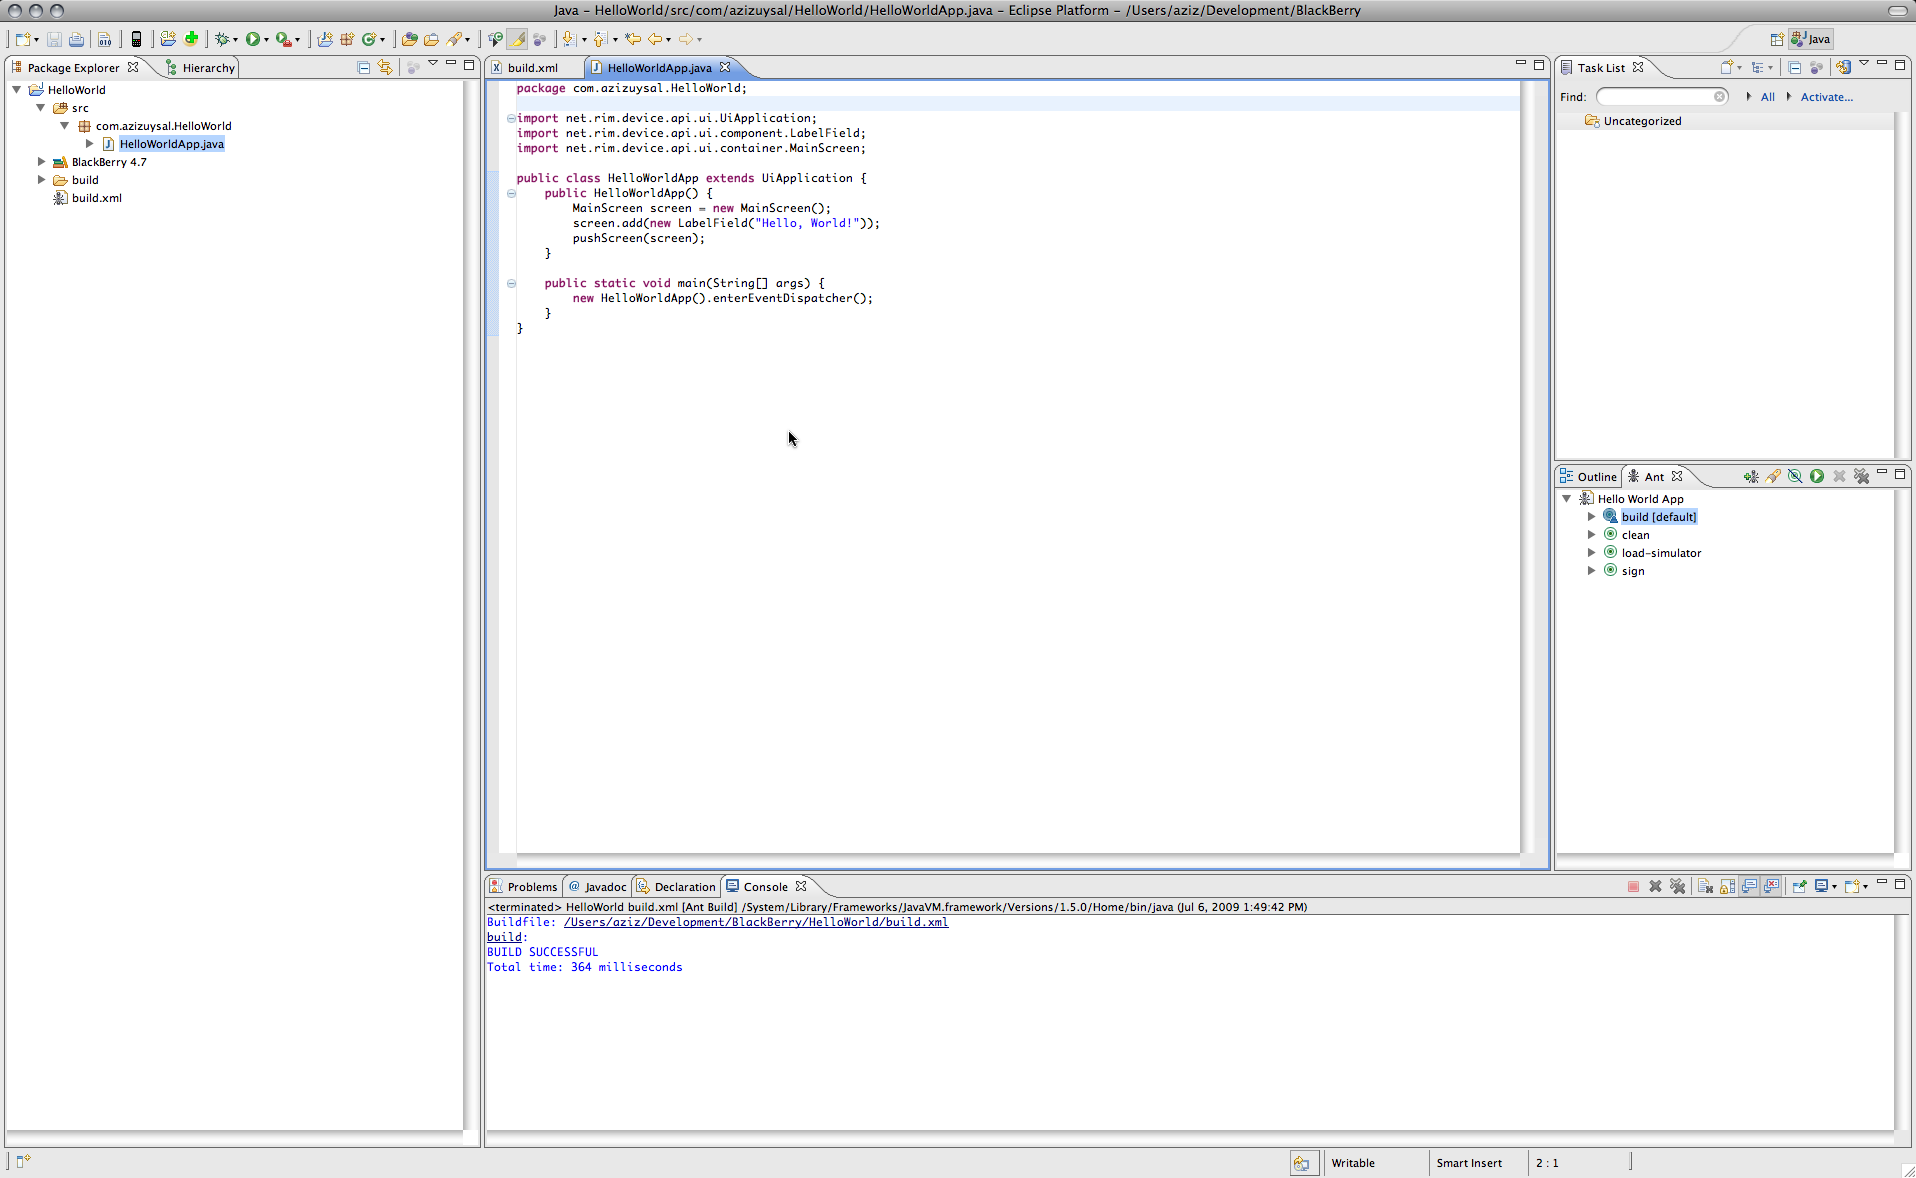
Go to Window->Show View->Ant to show the ant view and drag build.xml file into this view. You can now run the ant scripts by double-clicking on them. Double-click the build script, and you should see a BUILD SUCCESSFUL message in your Console window in eclipse.
Running the BlackBerry Simulator on Mac OS X
As I said before, we will be running the simulator in wine and we’ll use MacPorts to install wine. So, first, download and run the appropriate MacPorts installer for your system. Once you finish installing MacPorts, open Terminal and type the following command to install Wine via MacPorts (If you get an error message when you try to run port commands, make sure your .bash_profile is updated appropriately at the end of the MacPorts installation and your PATH variable contains the path to your MacPorts installation. Also make sure that you have an active internet connection):
sudo port install wine
After wine is installed, type the following to install the winetricks package which we’ll need in order to successfully run the BlackBerry simulator.
sudo port install winetricks
You’ll notice that MacPorts will also install quite a few more packages, as wine and winetricks depend on them.
We’ll need a shell script to run the simulator in wine easily, and the easiest way to create one is to copy the included windows batch file. Copy the ~/Development/BlackBerry/SDK/net.rim.eide.componentpack4.7.0_4.7.0.46/components/simulator/9530.bat file to 9530.sh file and edit it to read as follows:
#!/bin/bash
cd "`dirname $0`"
/opt/local/bin/wine fledge.exe /app=Jvm.dll /handheld=9530 /session=9530 /app-param=DisableRegistration /app-param=JvmAlxConfigFile:9530.xml /data-port=0x4d44 /data-port=0x4d4e /pin=0x2100000A
Save the file and set its execute permission:
chmod +x 9530.sh
Now, run winetricks and select gdiplus trick. Type in Terminal:
winetricks
Select gdiplus from the menu to install it. And finally, type the following to run the simulator in wine:
~/Development/BlackBerry/SDK/net.rim.eide.componentpack4.7.0_4.7.0.46/components/simulator/9530.sh
You should now see the BlackBerry simulator running in wine:
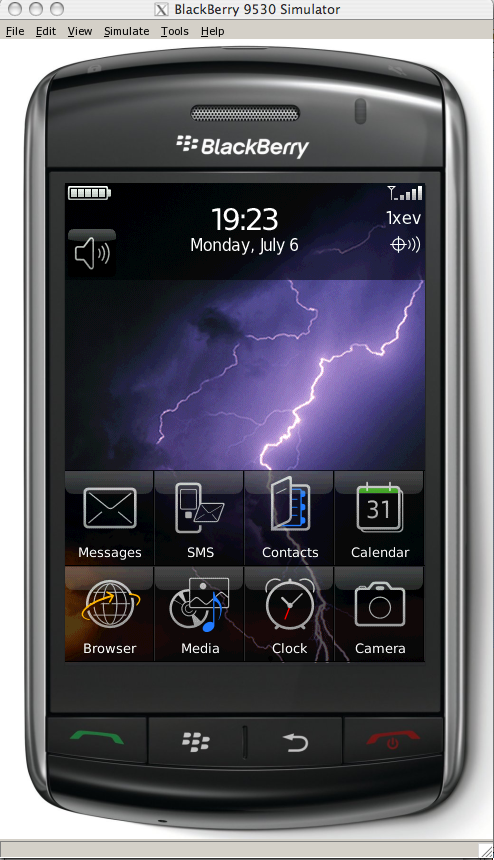
You can also try double-clicking load-simulator script in eclipse now and you should be able to see your project compiled and installed in the simulator.
Bonus Tip: Installing Additional Simulators
If you want to install additional BlackBerry simulators, you can download them from the BlackBerry website and use the following commands to install them:
wine ~/Downloads/BlackBerry_Simulators_4.6.1.79_8350i.exe /extract
wine msiexec /a ~/Downloads/SimPackageInstaller.msi /qn
mv ~/.wine/drive_c/Program\ Files/Research\ In\ Motion ~/Development/BlackBerry/SDK/
Create a .sh script file as shown above to run the new simulator, and don’t forget to update your build.xml file if you want to launch your projects in the new simulator automatically.
I’ll follow up with a second post that shows how to run the debugger and a couple of other more advanced tricks.